
A site-to-site VPN is an encrypted connection between two distinct computer networks. In a cloud context, the site-to-site VPN connection allows the cloud infrastructure to be integrated into the company’s network securely and privately, as if it were an extension of the company’s network. This means that sensitive company data, such as customer data, can be transferred between the cloud infrastructure and the company’s network securely.
Furthermore, a site-to-site VPN connection offers greater flexibility in managing cloud data and applications. For example, companies can perform backups of data or store data on different clouds, while maintaining the same security and connectivity they would have if the cloud were within the company’s network.
In this tutorial, we will see how to configure Mikrotik devices in IPsec with the site-to-site VPN service of Oracle OCI.
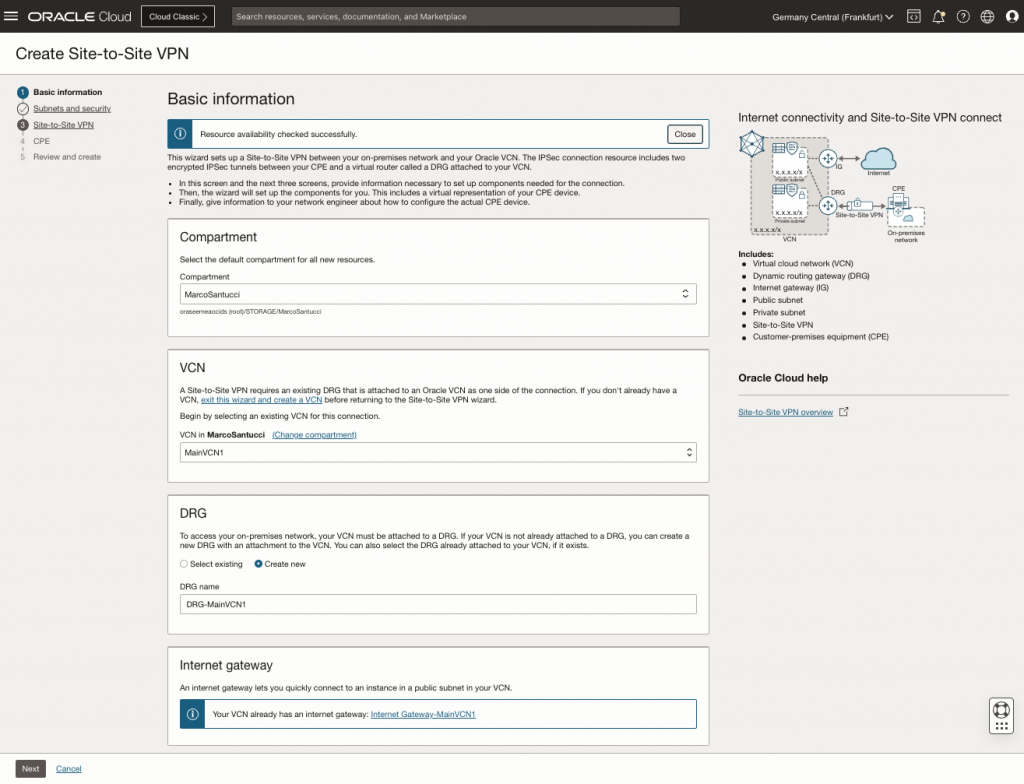
First step – Configure the VPN service on OCI environment (Start the VPN wizard):
Select the Compartment, VCN and DRG where do you want attach the VPN service.
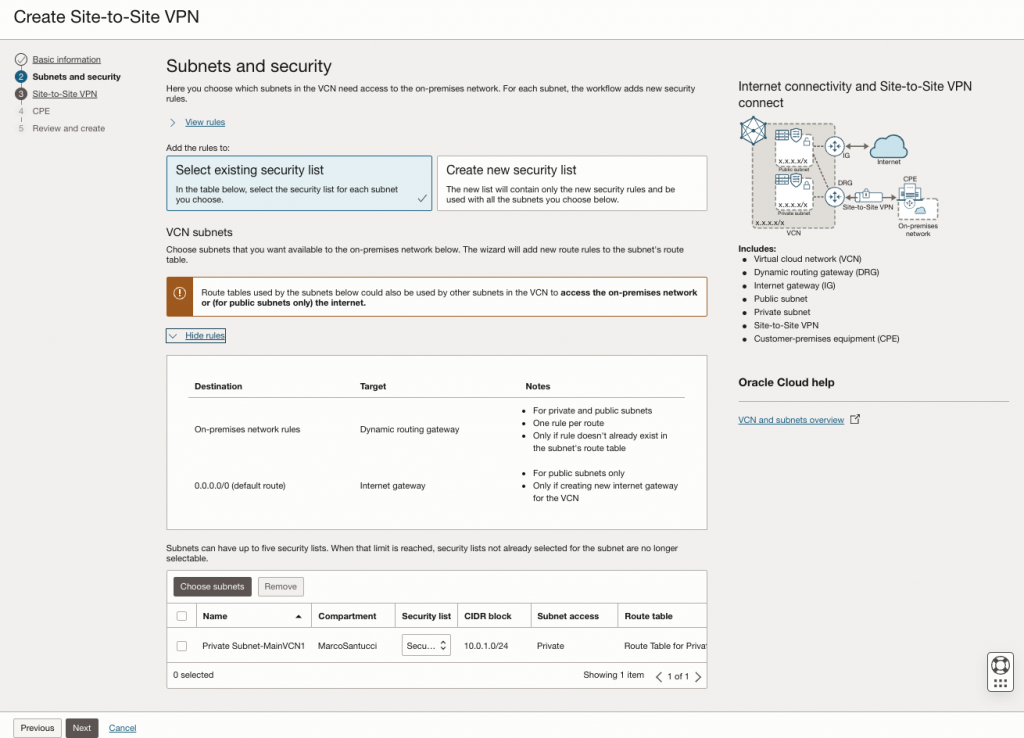
Select a security list to use or create a new one.
Choose the subnet that you want to connect with your on-premise datacenter. The wizard will add the automatically the new routes.
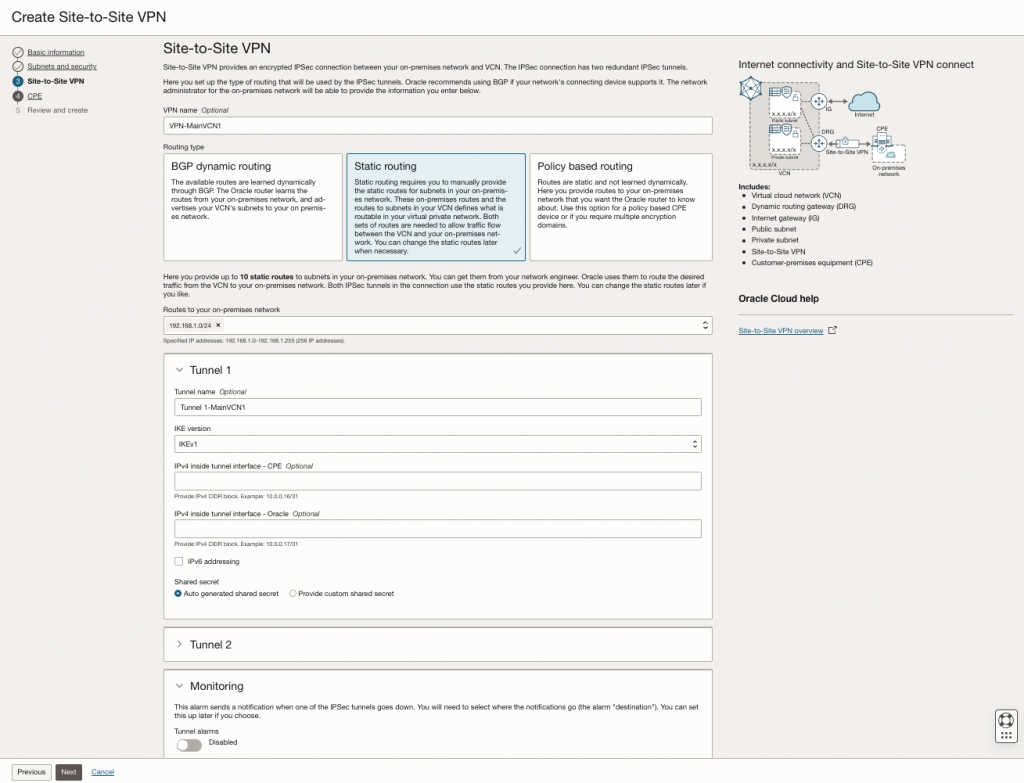
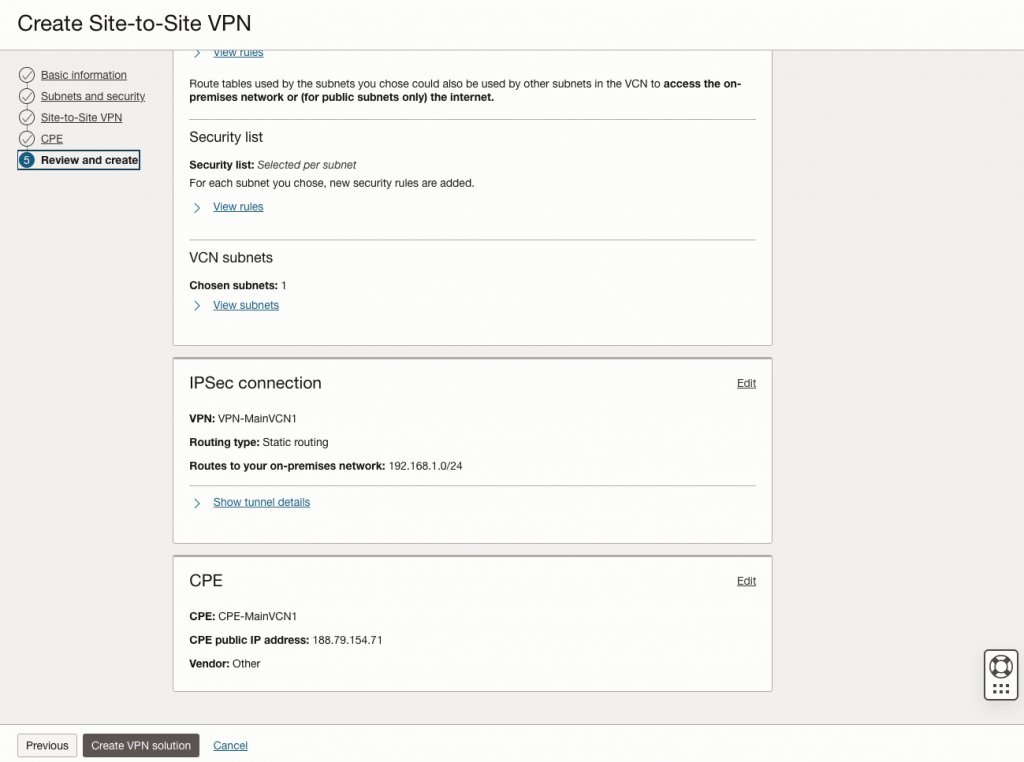
Select the routing type that you prefer. For this example we select a simple static routing.
Populate your on-premise subnets that you want to put in communication with OCI environment.
Leave blank the fields that are optional
Insert the public ip-address of your router.
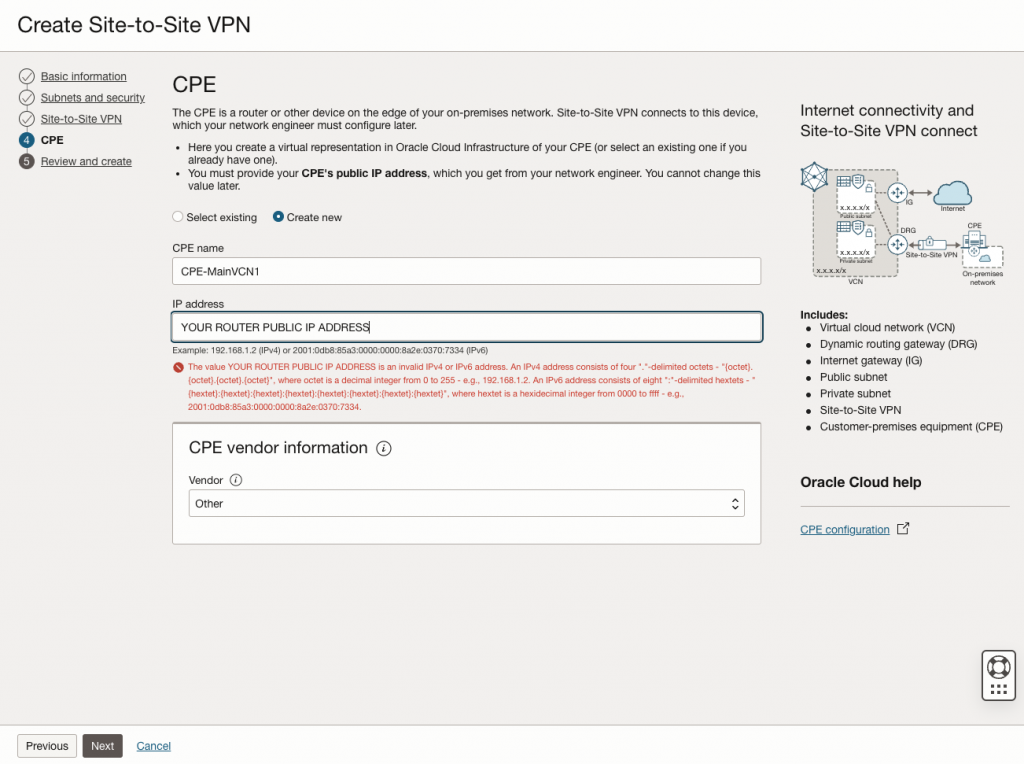
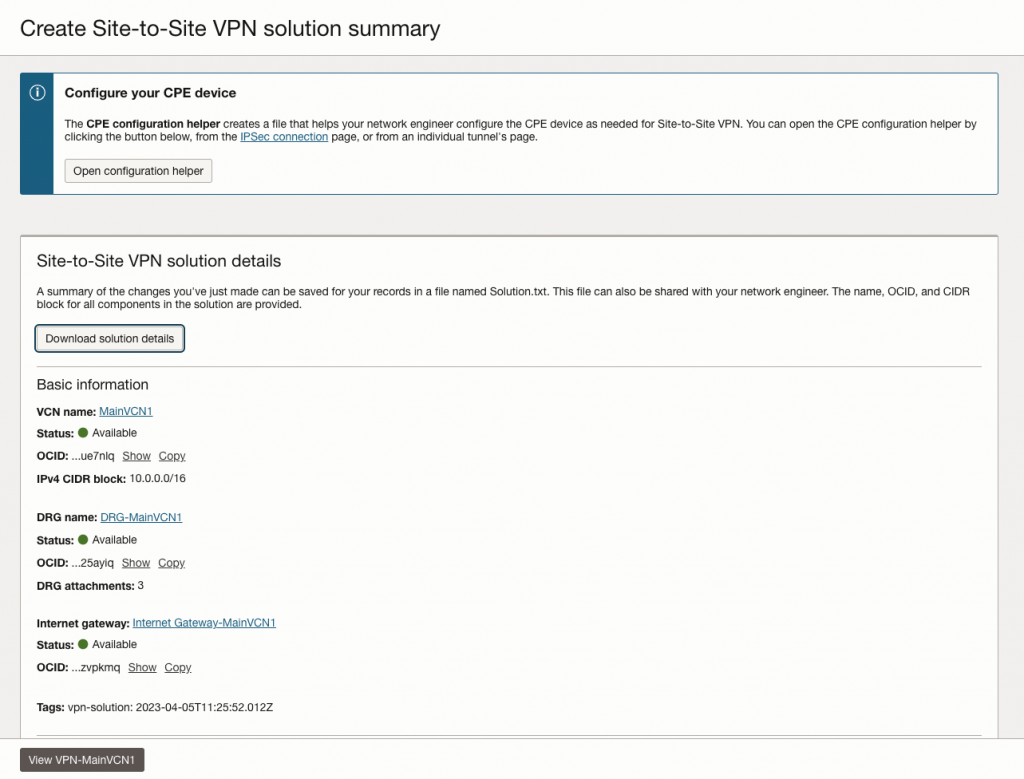
Now you can click on the button ‘Create VPN Solution’
After few moments you can download the ‘Solutions details’ where will be available all the info that you need to configure your Mikrotik router
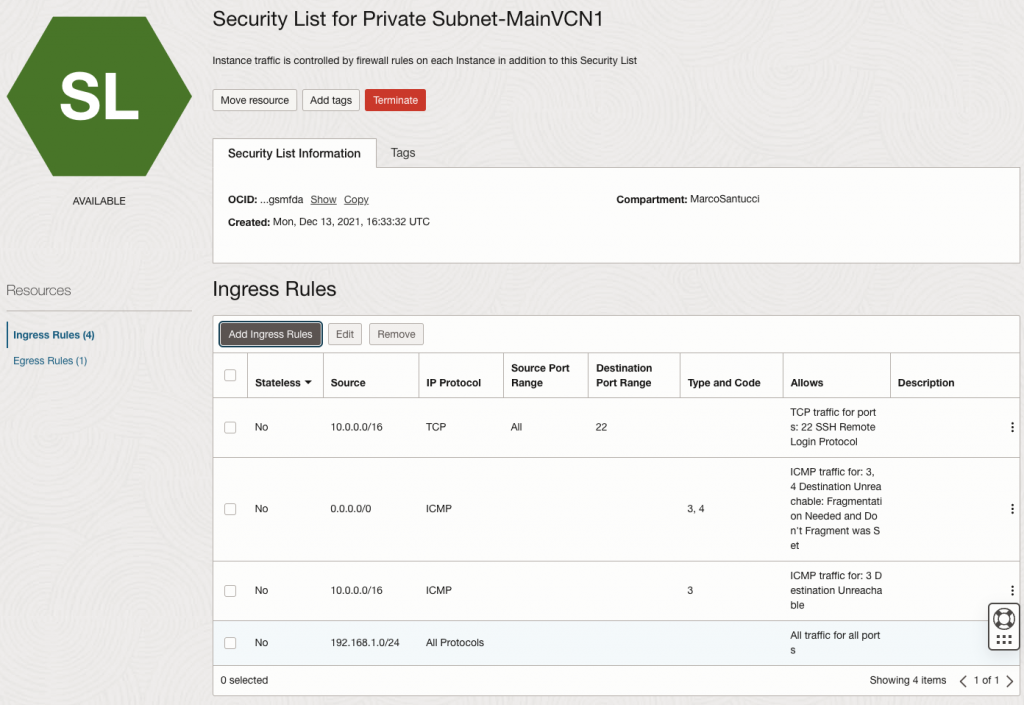
Check if into the security list attached to the desired private subnet is present your on-premise subnets allowed to access.
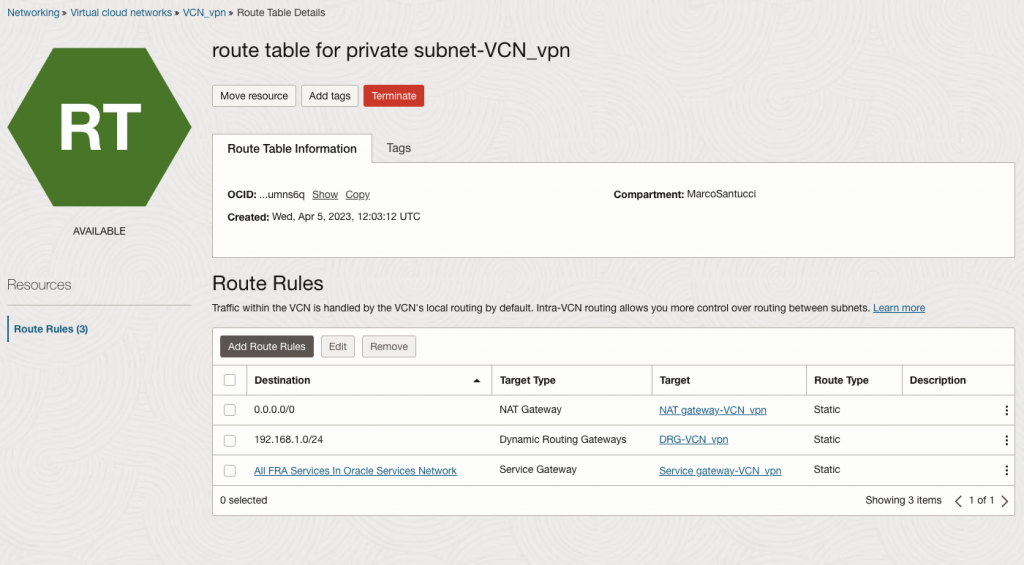
Check as well if your on-premise subnet is correctly added to the route table for the previous selected subnet.
Second step – Configure your Mikrotik router
You can use WinBox application to access and configure your router
Into the IP menu select IPSEC.
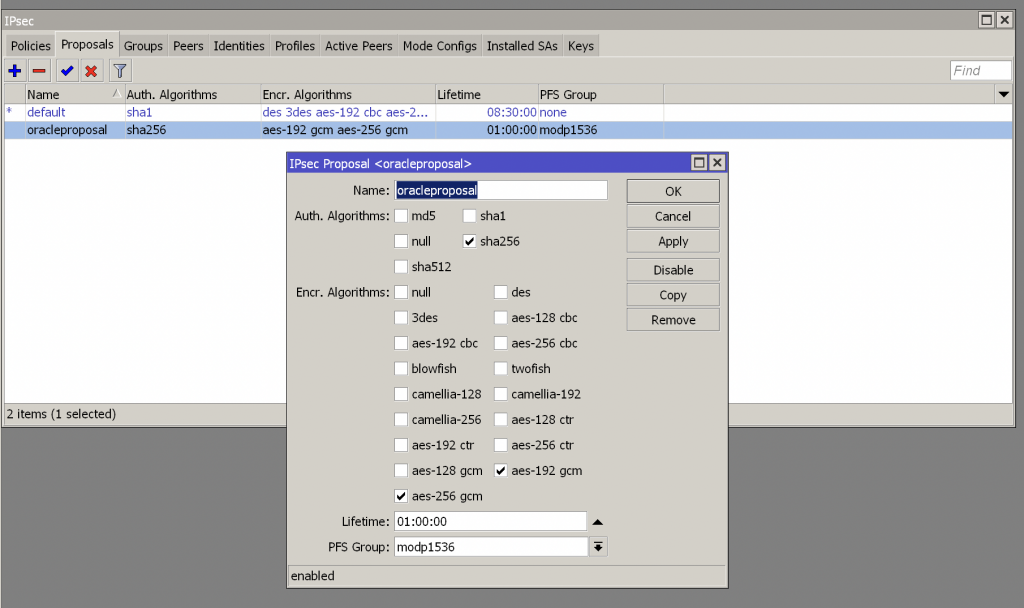
Create a new Proposal with the following settings:
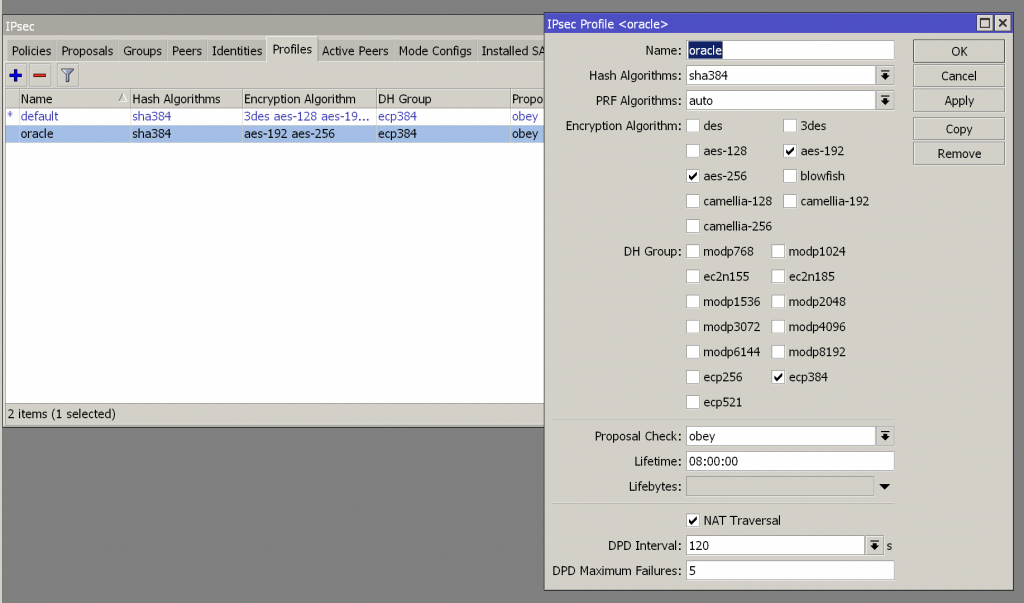
Create a profile with the following settings:
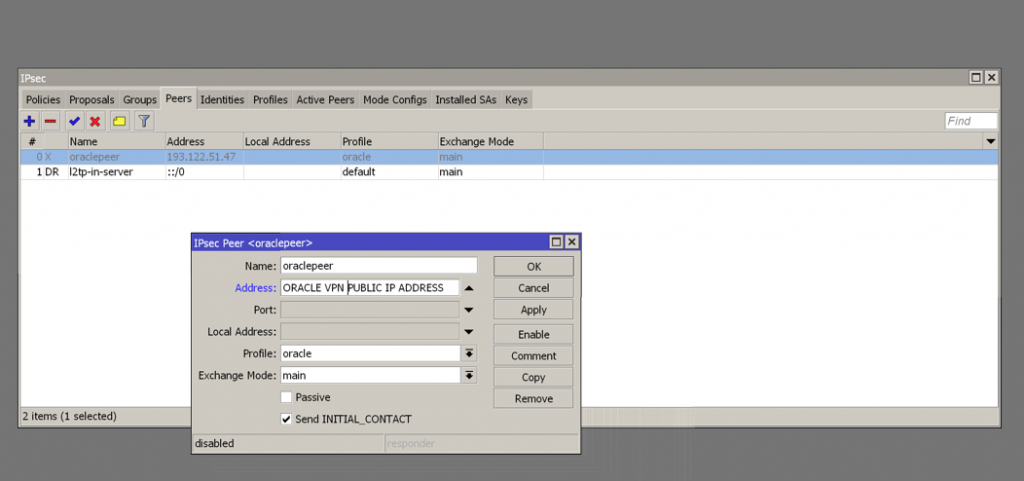
Create a Peer with the Oracle OCI public VPN address of tunnel 1 (You can get it into Solutions details txt file previously downloaded) and select the previous profile created
Create an IPsec Group

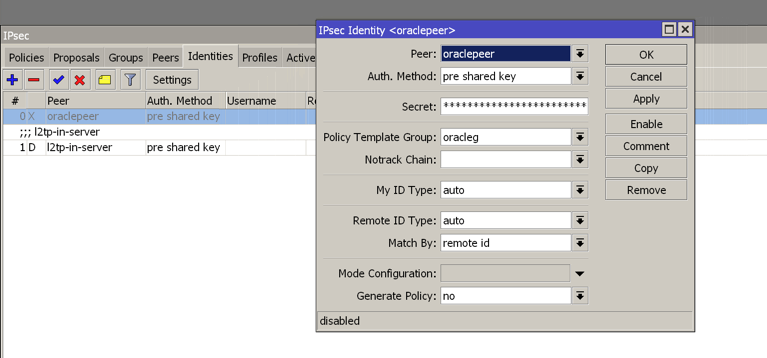
Create a new identity selecting the peer and group created previously and insert into the field ‘secret’ the shared secret autogenerated for tunnel 1 (You can get it into Solutions details txt file previously downloaded)
Create an new IPsec policy selecting the previous created peer and the source/destinations subnets of your on-premise/OCI architecture.
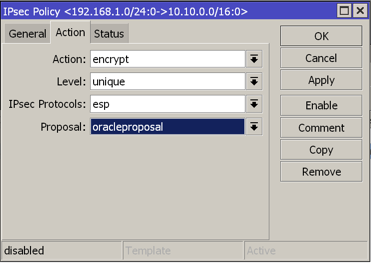
Select your proposal previously created under the ‘Action Tab’
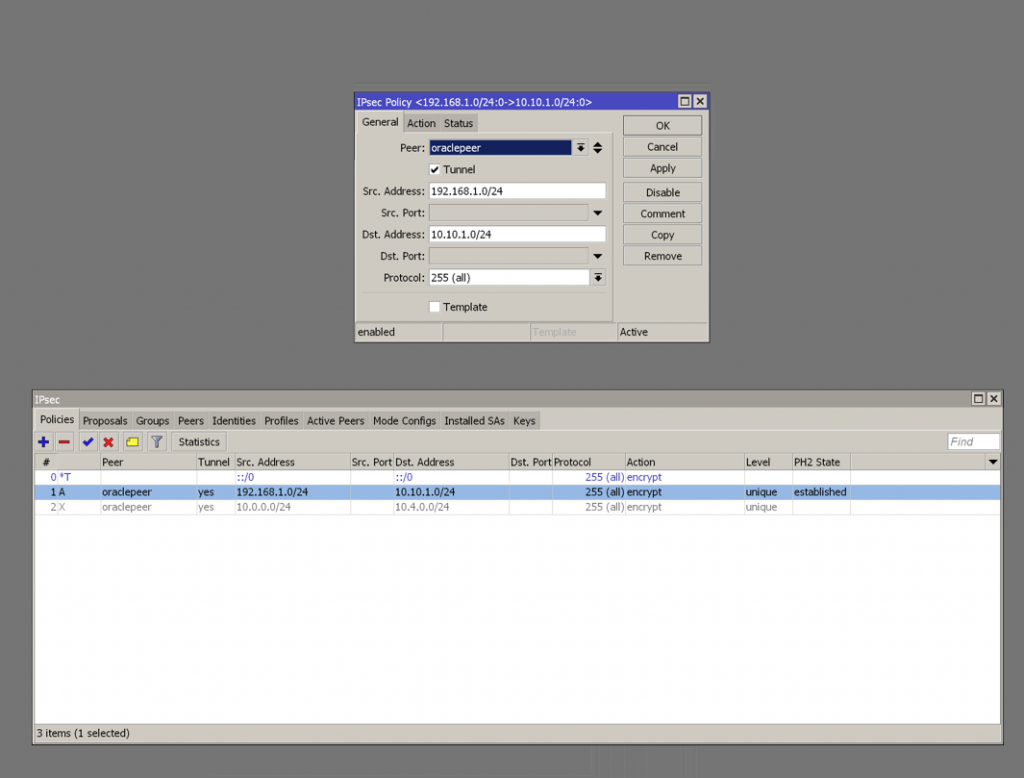
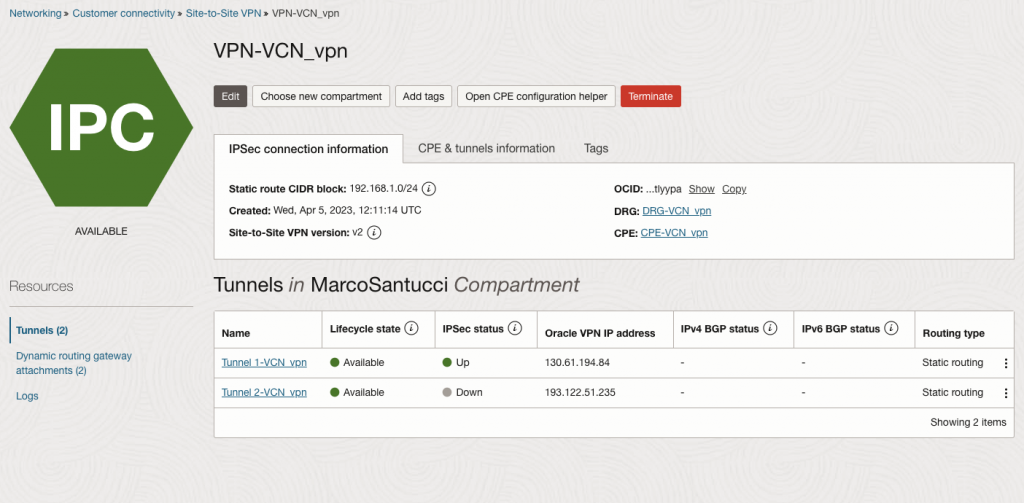
At this point, the IPSec status provided on OCI console should be green.
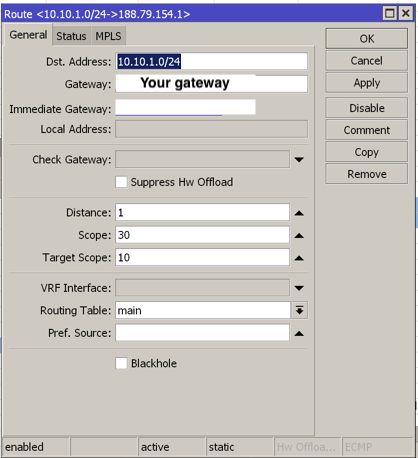
Create a new route roule on Mikrotik. Put the OCI subnet as destination and put your local WAN port or your actual gateway ipaddress as your gateway.

Create a new NAT roule to permit the communication between you on-premise LAN subnet to the remote OCI subnet (Action need to be set as “Accept”).
Remember it’s need to be placed at the top of the list, otherwise it won’t work!

Check if all it’s working ok creating an instance into the OCI’s private subnet and try to ping it from your on-premise.
Enjoy!
Documentation:
- IPsec Oracle OCI parameters
- Mikrotik IPsec Manual
- IPsec: Phase 1 profile Phase 2 proposal


Vlw pelo tutorial, tunel fechou conexão.
Porém estou com problemas de comunicação entre os tuneis, da OCI pingo na rede on-primise mas do contrário não consigo.
Hello, remember to allow communication with the OCI subnet on the router firewall and, on OCI, you must add a specific stateful ingress rule allowing ICMP traffic, specifically Type 8 Echo Request, in the security list associated with the subnet you want to reach.
Official OCI documentation link